This module is very similar to other OIDC methods like Azure, Okta, AD FS, PingIdentity, and the generic OpenID Connect, but has specific functionality in it to work with Active Directory Federated Services. You will also want to review the general Auth Module document for more information on authentication as a topic.

Because this authentication is handed off to the provider, it offers full SSO and MFA support per the provider configuration.
Generally speaking, you will want to enable Use Authorization Code Flow. If there is a problem, you can disable this as a test of falling back to another code flow method.
Account Name Style is partially cosmetic but can have a functional impact. This allows you to set how the account is displayed in the Web UI upper corner, as well as how it is recorded in logs, and shows in the Account list in the platform. This can be important to avoid collisions. If you use Full Name for example and two people are John Smith, we have an issue. But if you use UPN Without Domain and that results in jasmith and jbsmith, then there is no issue because those are unique names for account records.
The Label is arbitrary and will be displayed on the login page. In General using the name of the service (e.g. Google or Azure) as the label is expected.
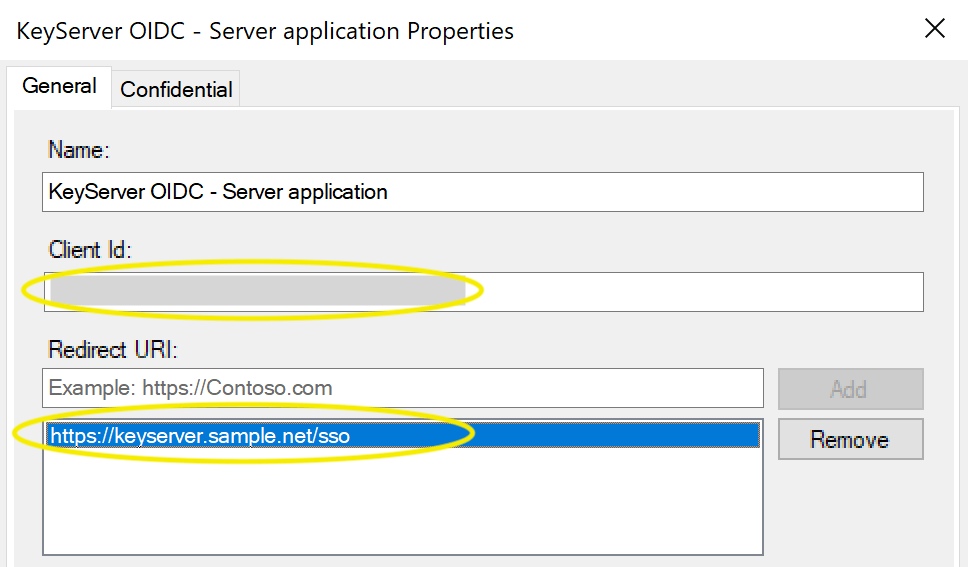
The Redirect URL should always be https://[your.keyserver.hostname]/sso
Configuration Steps
The configuration of ADFS is complex and largely left to the customer. Note in our experience IIS, Certificate services, and all related interactions with ADFS need to be set up first. Following are points on creating the OpenID Connect configuration for KeyServer to such an implementation. This is guidance only and not guaranteed to be precise to your environment.
Add an OpenID Connect configuration to ADFS
- Open the "AD FS Management" tool located under the "Tools" menu at the top right of the Server Manager.
- Select the "Application Groups" folder item in the left sidebar.
- Click on "Add Application Group..." in the sidebar to the right.
- Give the application group a name, for example “KeyServer OIDC"
- Select the "Server application accessing a web API" list item and click next.
- Copy and paste the Client Identifier to a text file for later use.
- Enter the your authentication "Redirect URI" and Click next.
- Tick the "Generate a shared secret" box. Copy and paste the Secret to a text file for later use. Click next.
- Paste and add the Client Identifier (from above) as the "Identifier". Click next.
- Select the access control policy you'd like to use (e.g., “permit everyone”) and click next.
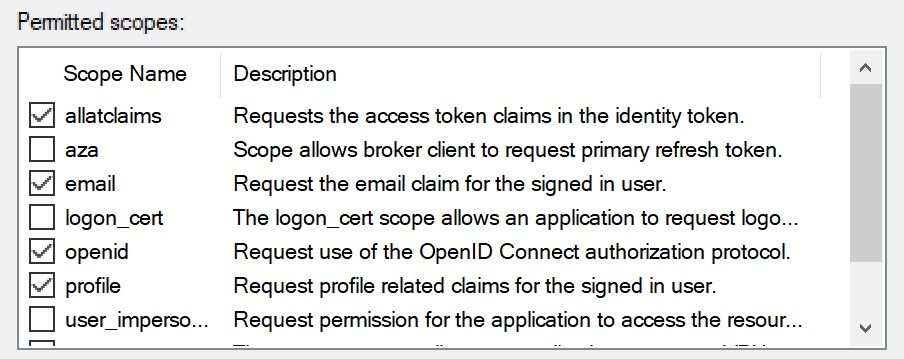
- Check the boxes next to “openid”, “profile”, “email”, and “allatclaims”
- If the “allatclaims” scope does not appear in the list, you can add it by clicking “New Scope"
- Finish the wizard.
Configure OpenID Connect to provide user groups as claims
- Open the "AD FS Management" tool located under the "Tools" menu at the top right of the Server Manager.
- Select the "Application Groups" folder item in the left sidebar.
- Double click on the group added earlier, then double click on the "Web API" application.
- Select the tab named "Issuance Transform Rules".
- Click the "Add Rule..." button at the bottom.
- Select "Send LDAP Attributes as Claims" and click next.
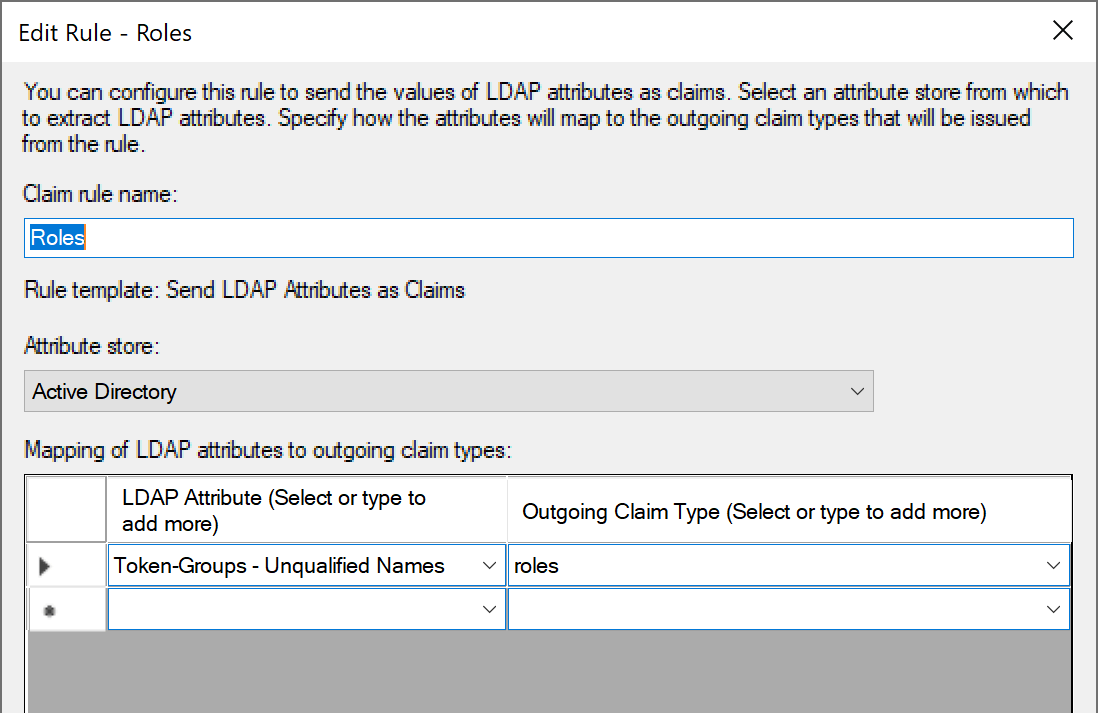
- Give the rule a name, for example "Roles".
- Select "Active Directory" as the "Attribute Store".
- In the table below, select "Token-Groups Unqualified Names" in the first column and type "roles" into the second column.
Check that everything is configured as needed
- Open the "AD FS Management" tool located under the "Tools" menu at the top right of the Server Manager.
- Select the "Application Groups" folder item in the left sidebar.
- Double click on the group (e.g. KeyServer OIDC)
- Select the Server application and click Edit
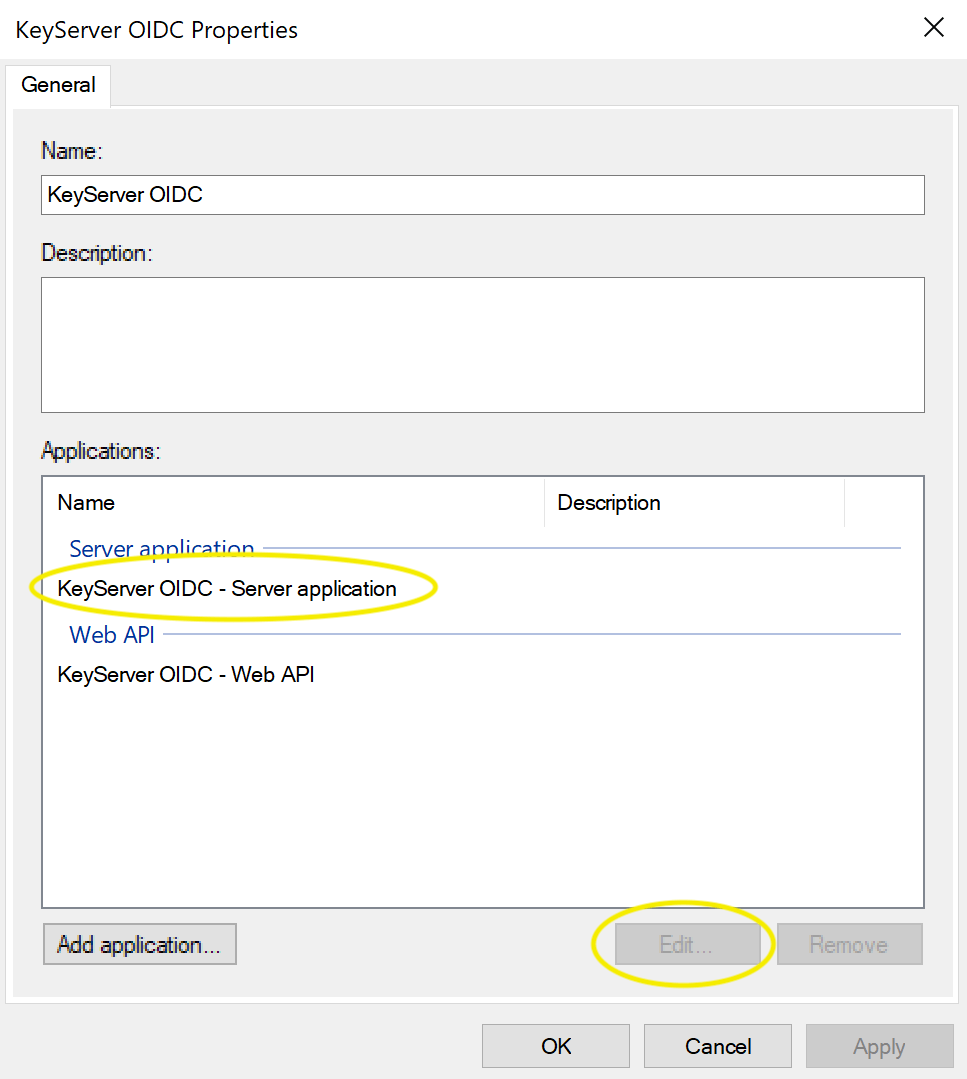
- Check that the Client ID and Redirect URI are correct, then Cancel to dismiss
- Back in the Application Group window, select the Web API and click Edit
- In the Identifiers tab, check that the above Client ID is listed in Relying party identifiers

- In the Client Permissions tab the Server application should be listed, and there should be four checked Permitted scopes:
- In the Issuance Transform Rules tab there should be a Roles item. Double click it
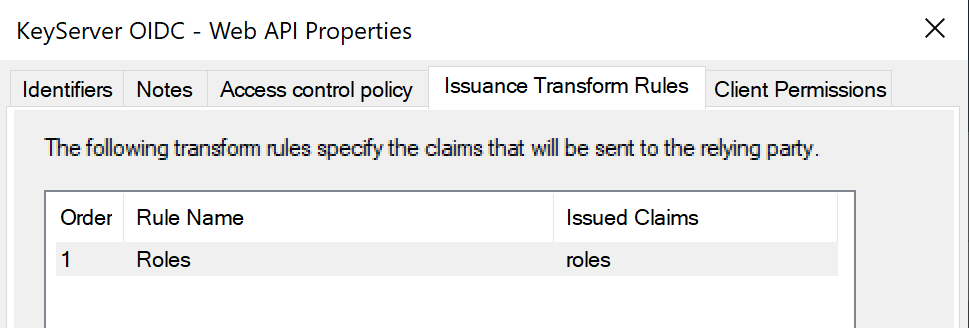
- The Roles rule should look like below. Cancel to dismiss and windows.
You should now be set up for ADFS Authentication. Enter the Client ID, Secret, Redirect URI, and ADFS Host into the Admin Authentication module in KeyConfigure.