Body
This module is very similar to other OIDC methods like Azure, Okta, AD FS, PingIdentity, and the generic OpenID Connect, but has specific functionality in it to work with Google (GSuite). You will also want to review the general Auth Module document for more information on authentication as a topic.

Because this authentication is handed off to the provider, it offers full SSO and MFA support per the provider configuration.
Generally speaking, you will want to enable Use Authorization Code Flow. If there is a problem, you can disable this as a test of falling back to another code flow method.
Account Name Style is partially cosmetic but can have a functional impact. This allows you to set how the account is displayed in the Web UI upper corner, as well as how it is recorded in logs, and shows in the Account list in the platform. This can be important to avoid collisions. If you use Full Name for example and two people are John Smith, we have an issue. But if you use UPN Without Domain and that results in jasmith and jbsmith, then there is no issue because those are unique names for account records.
The Label is arbitrary and will be displayed on the login page. In General using the name of the service (e.g. Google or Azure) as the label is expected.
The Redirect URL should always be https://[your.keyserver.hostname]/sso
Configuration Steps
- Log into the Admin console for G Suite.
- Go to https://console.developers.google.com/apis/dashboard
- Click on the project menu next to the GoogleAPIs title. In this screenshot it reads “maps-in-maps”, but it might say “Select a project” if you don’t have any projects set up.

- Make sure your domain appears in the Select from menu, and click New Project in the upper right.

- Give the project a decent name and note the Project ID. Be sure that the proper organization and domain (location) is selected. Click Create. Once the project is created you might still be viewing the previous project, so click the View button in the popup if Google shows it, otherwise navigate to the new project.
- You might find yourself on an unexpected page. Click on the GoogleAPIs title in the upper right and that will bring you back to a page that has some things we need.
- Next step is to enable the Admin Directory (Admin SDK) API for this project.
- Click the Enable APIs and Services link at the top of the page.

- In the resulting page, type “admin” in the search box. One of the results will be Admin SDK, choose that.
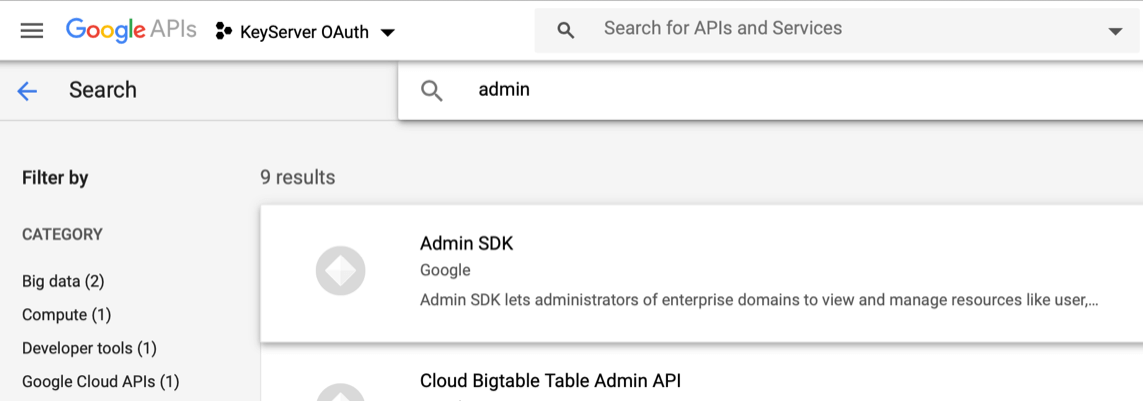
- That will take you to the Admin SDK page. Click the Enable button.
- Once you’ve enabled this API you’ll be taken to the page for managing it, which we don’t need any more. Click the GoogleAPIs title at the top left and you’ll get back to the main APIs & Services / Dashboard page. At the bottom of this page you’ll see the Admin SDK listed, and we’re all done with that step.
- Click on the “OAuth consent screen" nav on the left hand sidebar. In the resulting page, click “Internal” and then “Create”. That will take you to a page with a bunch of options you can mostly ignore. You should enter an Application name in that field, and make sure the Support email is an account that makes sense. Then click Save.
- Click on the Credentials nav on the left hand sidebar (If you see a message about configure the consent screen, you need to do the previous step again and make sure to click Save). We need to create a Client ID and a Service account on this page.
- Click on “Create Credentials” toward the top of the page and select “OAuth client ID”.
- Choose “Web application” as the type. Give it a name.
- If you know what you are doing you can add an “Authorized JavaScript origin”, or you can just leave it as it is.
- For the “Authorized redirect URI”, click “Add URI”. You must put the correct URL of your TDX ITAM Server (or KeyReporter stand alone) host, with a path of /sso. The URL must be HTTPS, and if you use a non-standard port that must be included as well.
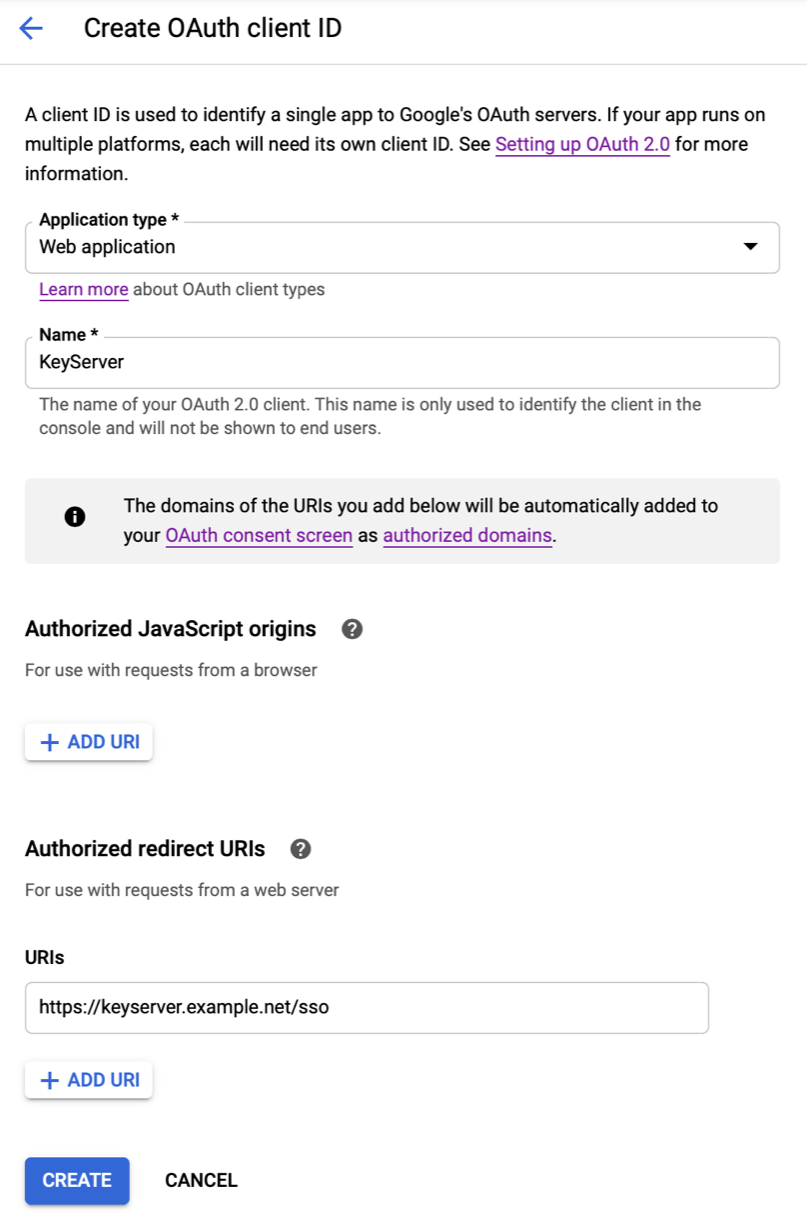
- Click Create. You’ll then see the two important bits of information associated with this new OAuth client, the Client ID and Secret. You can get these values at any time from the Credentials page, or copy the values now.
- Click OK.
- Back on the Credentials page, click on the OAuth Client you made, and you see the Client ID and Secret in the upper right. Take note of that “Reset Secret” button, which might come in handy. Google recommends resetting the secret every so often, which means you have to add the new value to the KS configuration when it changes.
- Go back to the Credentials page, click “Create Credentials” again and this time pick “Service account”.
- Name it, describe it if you want, click Create. The name should probably be something meaningful in your organizational structure for reference.
- On the next two screens you can assign roles for granting access, and give other accounts access to manage this service account.
- Click Continue and then Done.
- Now back on the Credentials page you’ll see the two things you just created.
- Click on the Service account name.
- Click “Show domain-wide delegation”, then click “Enable G Suite Domain-wide delegation”.
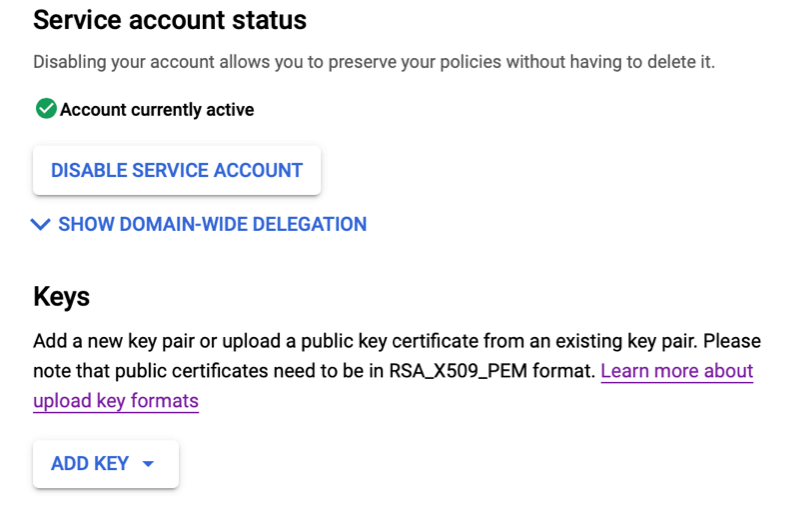
- Click on “Add Key” toward the bottom and select “Create new key”. Choose JSON and click Create. This will download an important and highly sensitive file to you computer. You won’t be able to get this file again, but you can always generate a new key (and redeploy it as we’ll describe below).
- Now click Save. Here’s what the Credentials page should look like. A new OAuth client ID was created for the service account. (It’s not clear why, but this client cannot have an associated redirect URI, otherwise maybe we could use it instead of creating our own Client ID.)
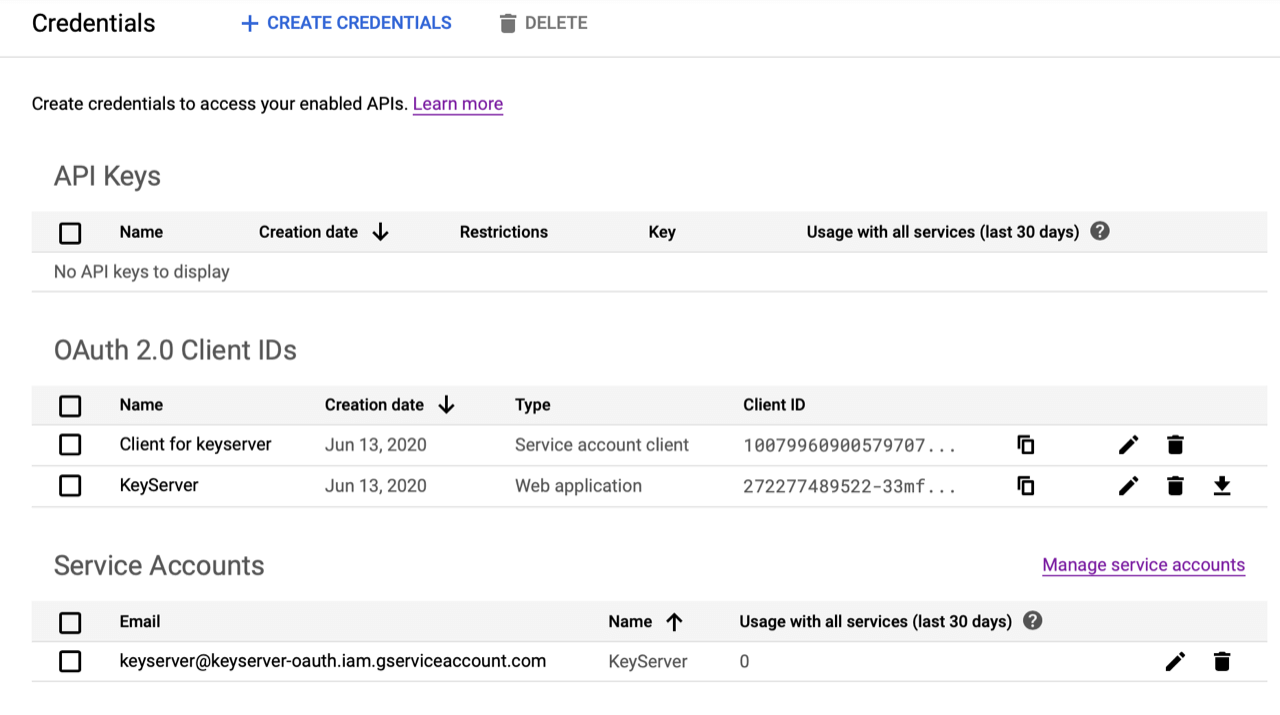
- Click on the Service account you just made. Select the Unique ID value and Copy it.
- Open a new browser window and go to the G Suite Admin console.
- Now go back to the GoogleAPIs site (here: https://console.developers.google.com/apis/dashboard).
- Click to the Credentials page. We need those two values for the OAuth client.
- Click on the client you created (not the one that Google created automatically for the service account). You’ll need the Client ID and the Client secret.
- Also grab that “json” file that was downloaded when you created the Service account. Rename that file “google.json” and put it into the KeyServer Data Folder on your KeyServer host. Delete other copies of it if you want to be extra careful. Remember that you can always create new keys (and a new json file) if you need to, in which case the new file will need to be placed into the KeyServer Data Folder (and re-named “google.json”).
- Run KeyConfigure, log into your TDX ITAM Server, then choose Config -> Admin Authentication. Select Google from the “Method” pop-up menu.
- Copy and Paste the Client ID and Client Secret into the appropriate fields in this dialog.
- Add a Label, which will be displayed in the Sign In page of KeyReporter (the button will be “Sign In with Xxxx”).
- You also must provide the name of an account in your G Suite domain that has sufficient access to see users, groups, and group members. The service account will only be able to view the basic user and group information, and will not be able to make any changes or see other data even if the given account has broader access.
- Click OK.
Reference the Admin Access documentation to learn how you can grant access to users who have accounts in your G Suite domain. You can assign roles manually to external accounts, or you can use group memberships to automatically assign roles. Do one of those things, then you’re all set up to use Google to authenticate your admin users in the Web UI.