Body
This module is very similar to other OIDC methods like Google, Okta, AD FS, PingIdentity, and the generic OpenID Connect, but has specific functionality in it to work with Azure (Entra). You will also want to review the general Auth Module document for more information on authentication as a topic.


Because this authentication is handed off to the provider, it offers full SSO and MFA support per the provider configuration.
Generally speaking, you will want to enable Use Authorization Code Flow. If there is a problem, you can disable this as a test of falling back to another code flow method.
Account Name Style is partially cosmetic but can have a functional impact. This allows you to set how the account is displayed in the Web UI upper corner, as well as how it is recorded in logs, and shows in the Account list in the platform. This can be important to avoid collisions. If you use Full Name for example and two people are John Smith, we have an issue. But if you use UPN Without Domain and that results in jasmith and jbsmith, then there is no issue because those are unique names for account records.
The Label is arbitrary and will be displayed on the login page. In General using the name of the service (e.g. Google or Azure) as the label is expected.
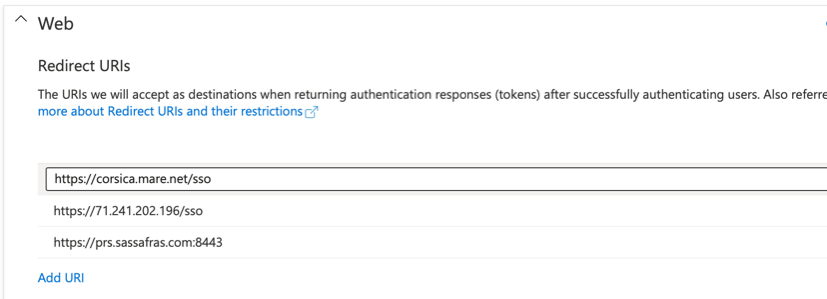
The Redirect URL should always be https://[your.keyserver.hostname]/sso
Azure has two additional options: Use App roles for authorization and Use group memberships for authorization. The second one is ONLY relevant if you use the first. In fact, the default behavior is that it's enabled even when it's off, unless app roles is on. This is for legacy reasons, and again it (group membership) should only be turned on if you enable the first (app roles) in the case you want to use both. Using app roles is an Azure thing that allows you to assign membership by roles instead of groups. This is rarely used so most sites should leave both of these off to avoid confusion unless you have a specific use case.
Configuration Steps
- Login to the Azure AD portal
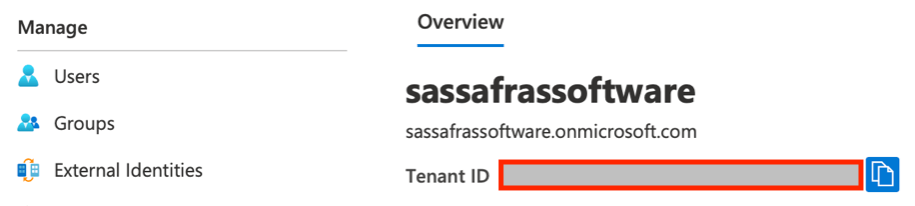
- The Tenant ID is shown on the Overview page. The directory name is an alias for the tenant ID.
- Click on “App registrations” to create a new app that will be granted access to read various parts of the AD. At the top, click “New registration”, then provide a name for the app. For the “supported account type” choose Single tenant. Click Register to proceed. Now, on the App registrations page you’ll see the app listed. Note the Client ID is shown here as well.

- Click on the app to see more details. Click on the “Authentication” navigation item.
- Add the appropriate Redirect URIs to the list (e.g. https://your.server.com).
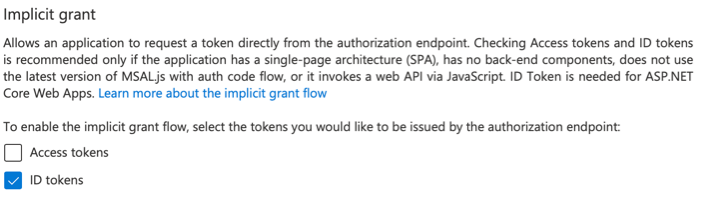
- Make sure “ID tokens” option is checked. Click Save.
- Click on the "Certificates & secrets" nav:
- Add a client Secret that will be used to query AD for group memberships. Note the actual Secret for our module is the Value of the Secret not the "Secret ID". MS is a bit confusing with their terms and UI.

- Click on the "API permissions" nav: (may not be needed if using Roles instead, see below)
- Add these permissions with type Application (not Delegated!): Directory.Read.All, GroupMember.Read.All, and User.Read.All (or User.ReadBasic.All if preferred). Be sure to grant admin consent on these permissions. User.Read should be added with type Delegated and no admin consent.

- Enter the Client ID, Secret, and Tenant created here in the Admin Auth and Client Auth plugins in KeyConfigure.
Note that when using Groups in your authentication settings, you must use Security groups, not O365 or Mail groups.
 Note: Azure requires that you use HTTPS (force) which means a valid SSL Certificate is required, and a valid Hostname setting.